Recipes
|
|
|
|
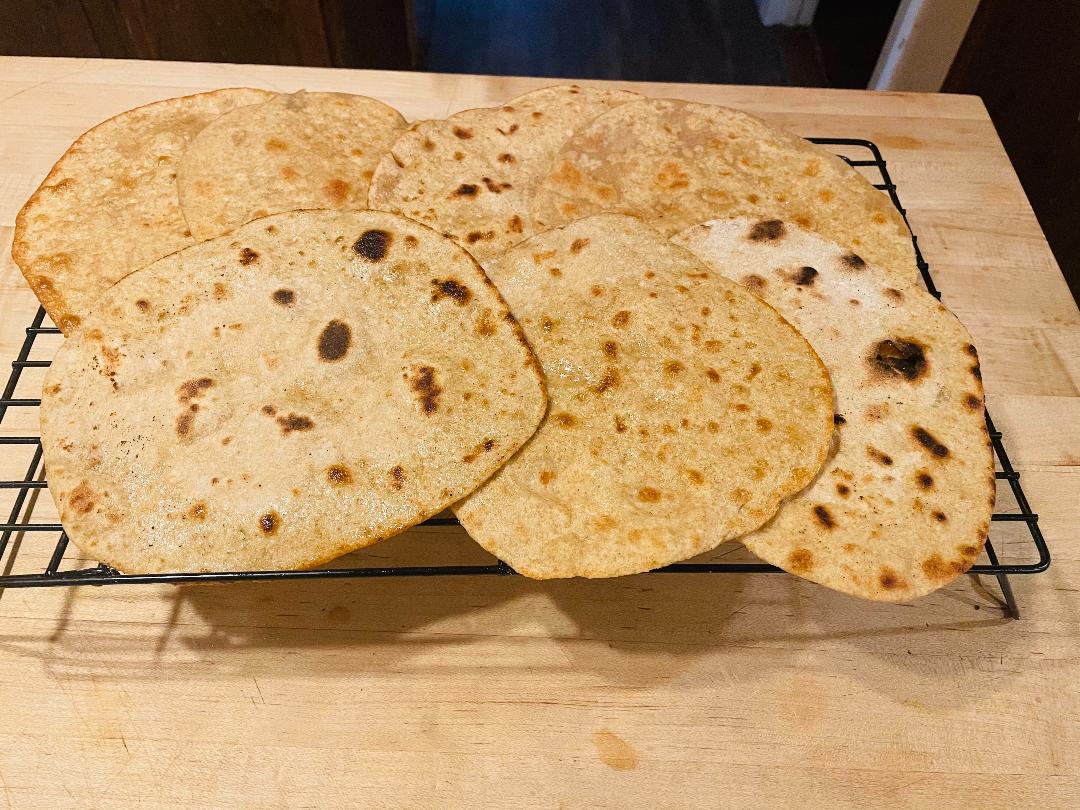 Serves 6
1 Roti per serving Ingredients: 1 cup organic whole wheat pastry flour 1/2 cup organic sprouted spelt flour 1/2 cup of organic Kamut flour Pinch of kosher salt 3/4 cup of water 1 tablespoon of olive oil or ghee (for cooking the roti) Blend the flours and salt in a bowl and begin to add the water. Stir with your hands until the dough feels smooth and elastic. Knead gently with your hands. When the dough feels soft and smooth, place in an oiled bowl and cover with a damp cloth. Allow to rest for 30 minutes. Dust the dough with a little pastry flour and make six even pieces. Using a rolling pin, roll to a slightly thin circle. Heat a cast iron pan or heavy bottom pan over medium heat. Add a half teaspoon of oil to the pan and swirl to coat. Place the roti into the pan and cook until it starts to bubble and slightly char with dark circles. Repeat the process until you've made all the roti bread. Serve. Tip: This dough freezes well. Place into a ziploc bag for later use if desired. Please note: Nutrition info is not included with the oil added. This adds a slight higher difference in calories and fat content.
0 Comments
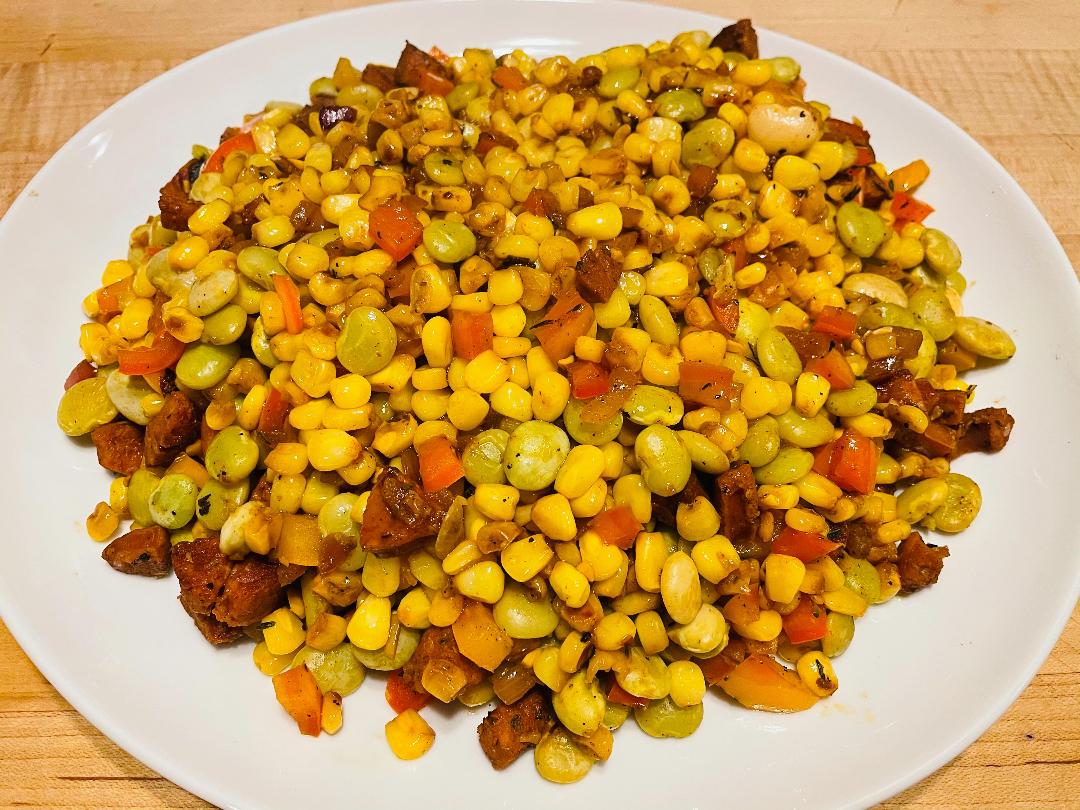 Succotash
Makes 4 servings (2 cups per serving) Ingredients: 2 cups of lima beans 4 cups of fresh corn, cut off of cobb or frozen unthawed 1 large red pepper, chopped 1 red onion, chopped 1 cup of turkey andouille sausage 1/2 teaspoon of Old Bay Seasoning 1/4 teaspoon of crushed black pepper 1/4 teaspoon of chipotle powder (optional) 2 cloves of fresh minced garlic 2 tablespoons of olive oil (divided) 1 cup of white balsamic vinegar or apple cider vinegar Salt & pepper to taste Directions: In a large pot, cook the lima beans in water until tender. (10-15 minutes.) Drain and set aside. While the beans are cooking, prepare the rest of the ingredients. Chop up the onion, pepper and minced garlic and add to bowl. In a large pan over medium heat. Add one tablespoon of olive oil. Swirl to coat and add the turkey sausage along with the old bay seasoning, chipotle powder (if using) and fresh minced garlic. Cook for 3-4 minutes until slightly browned. To the pan, add the onion, pepper and minced garlic. Cook for another 3-4 minutes. Add the corn and cooked lima beans. Add the vinegar to the pan and cook until it reduces. (Should take 3-4 minutes.) Add the remaining 1 tablespoon of olive oil. Toss to combine. Check for seasoning and add salt and pepper to taste. Serve. 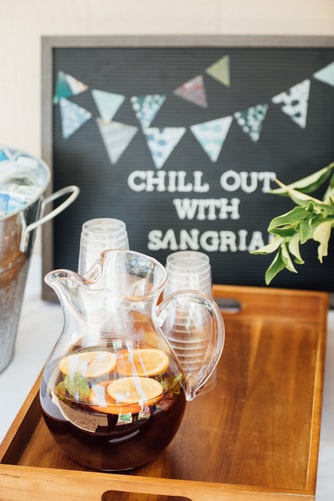 Most of us think of sangria as a refreshing alcoholic drink to enjoy in the warmer months of the year, but I love it anytime of the year. I've leaned back on drinking alcohol and only have it on occasion. But, I love the fact that traditional sangria incorporates red wine which is full of antioxidants. One way I got around this so I can enjoy often, is by replacing the red wine with hibiscus to give this drink its deep red color. Hibiscus, just like red wine, is full of antioxidants and also imparts a fruity and tart flavor which compliments this drink with the additional fruit added. Hibiscus also goes by the name of sorrel (popular ones are from Jamaica) which you can find easily in Caribbean markets. Enjoy! 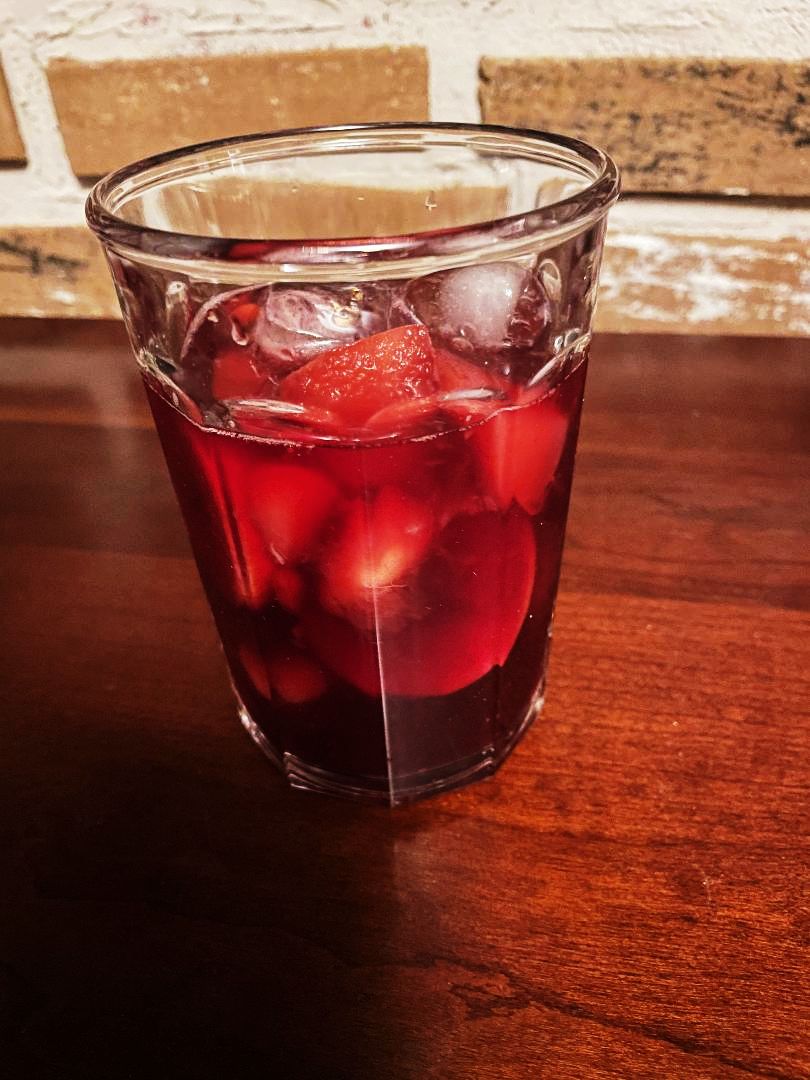 Ingredients: (Makes (8 ) 1 cup servings 1 1/2 cups of dried hibiscus/sorrel 8 cups of spring water 3 tablespoons of goji berries 2 Fuji apples or Gala apples, chopped 3 small mandarin oranges or tangerines, thinly sliced 2 sticks of cinnamon 8 teaspoons of elderberry syrup Ice for serving Directions: Place the hibiscus into a large heat resistant bowl. Boil the spring water and then pour over the hibiscus. Allow to sit and steep for 1 hour. While the mixture is steeping, add to a large pitcher, the goji berries, apples and sliced oranges or tangerines and the cinnamon sticks. Once the brewed mixture has steeped, place through a strainer to separate the hibiscus and then add to the pitcher with sliced fruit. To serve, place a couple of thick ice cubes in a glass and pour in a cup of sangria along with pieces of the fruit. Stir in 1 teaspoon of elderberry syrup to finish. Makes 8 1 cup servings.
Oven baked okra is my spin on fried okra I grew up with enjoying. I would frequently get this fried vegetable as a side at a fast food chain called "Church's Fried Chicken" The okra would be cut into chunks called "poppers" but in this recipe, the okra is sliced down the middle. Fried okra traditionally calls for cornmeal in most recipes, so I kept this important ingredient for texture and taste. However to make it more healthier, I substituted white flour with bennecake flour (a vintage seed similar to sesame seeds) This healthful addition gives you additional healthy protein and fat without sacrificing taste which is important. Be sure to use fresh okra for best results. To finish the dish, I brush the okra with just a few tablespoons of avocado oil. 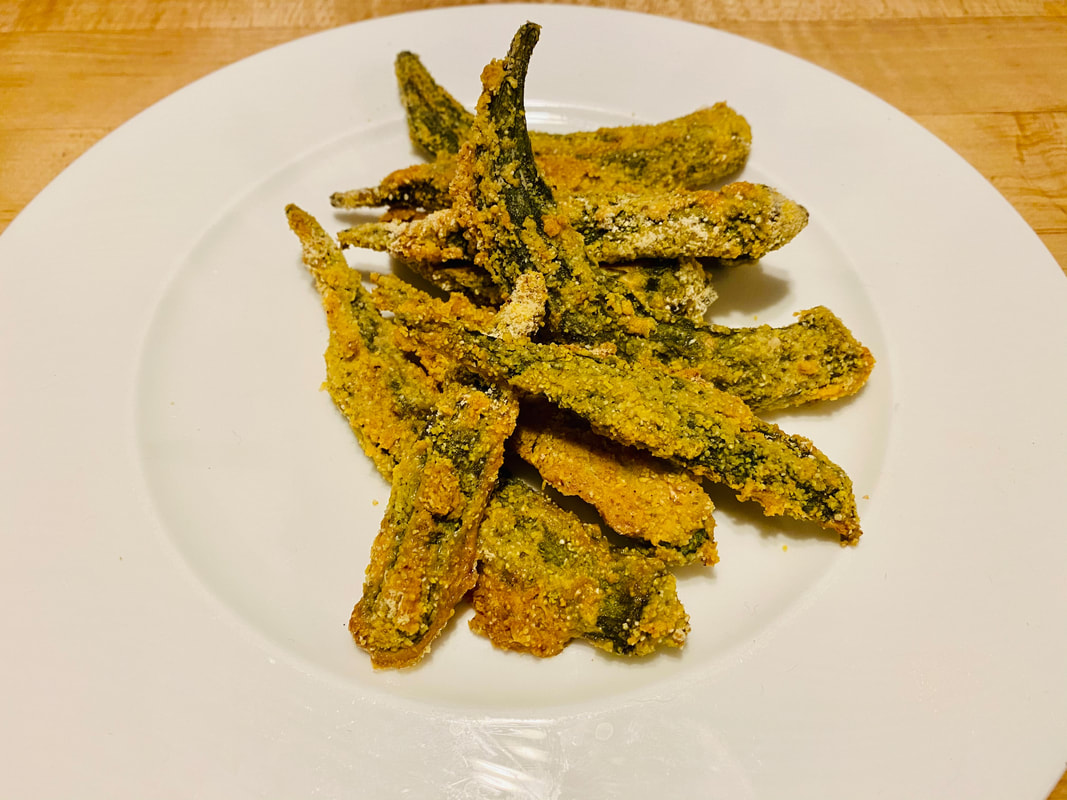 Ingredients:
1 pound of fresh okra sliced in half 1 egg, lightly beaten 1/2 cup cornmeal 1/2 cup bennecake flour 1/4 teaspoon chipolte powder 1/2 teaspoon of Himalayan salt or to taste 1 teaspoon of old bay seasoning 1 teaspoon of garlic powder 1 teaspoon onion powder Directions: Preheat oven to 400F. Line 2 sheet pans with parchment paper or lightly oil. To prepare the okra, place the sliced okra into a large bowl. Add the beaten egg and coat using a fork to toss. Set aside. In another bowl, combine the rest of the dry ingredients and mix together. Using your hand, shake off excess egg and dredge the okra into the flour mixture. Place the okra onto the prepared sheet pan. Space apart so that the okra does not steam. Bake for 15-20 minutes or until lightly browned. Flip the okra halfway through the cooking process. Serve immediately. I enjoy making soups because they can be versatile depending on what you may have on hand. Here is a simple pumpkin soup I created using canned pumpkin and coconut milk with other flavorful ingredients. I also like to have varying textures in a soup, so it is finished off with a savory crunchy granola topping. If you want to switch it up using cooked sweet potatoes, it will be equally delicious! 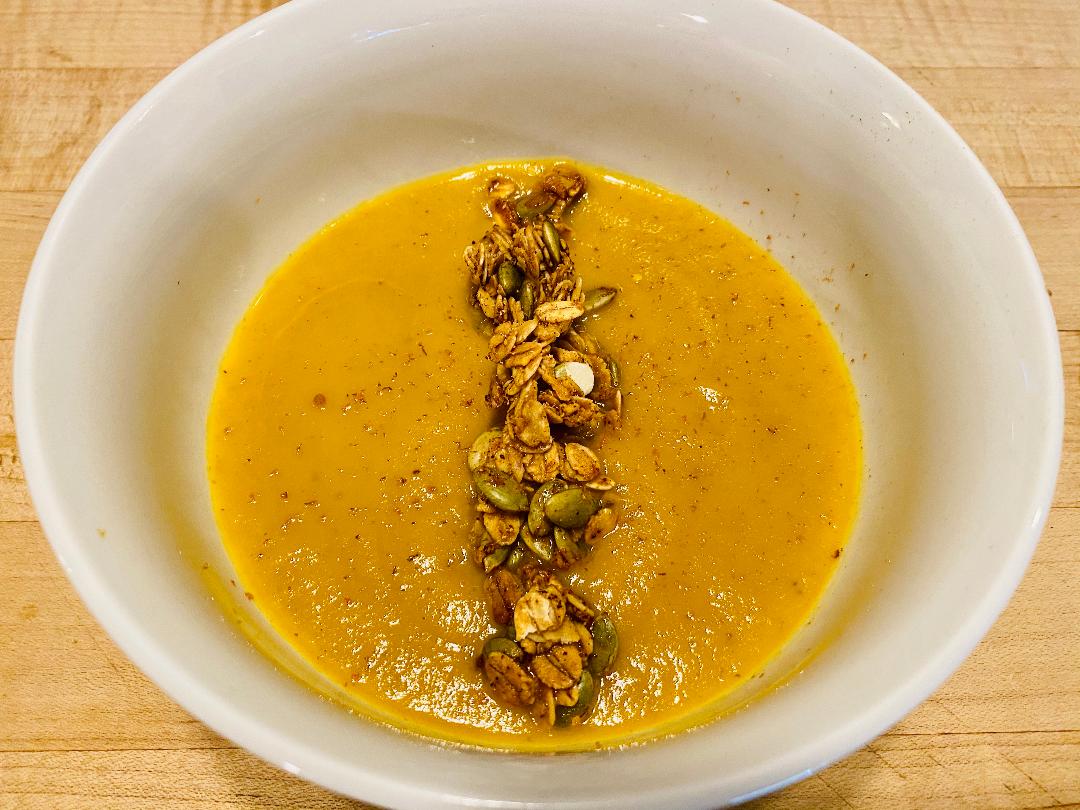 Ginger Pumpkin Soup with Savory Granola
Serves 6 1 cup per serving (Savory Granola) 1 cup of whole oats 1/2 cup of pumpkin seeds Pinch of salt 1/2 teaspoon of chipolte powder 1 tablespoon of ghee 3 tablespoons of honey (Soup Ingredients) 2 tablespoons of coconut oil 3 tablespoons of ginger 1 small onion, chopped 1 apple, chopped 1/2 teaspoon of garlic powder 1 heaping teaspoon of curry powder 1/2 teaspoon of thyme 1/4 teaspoon of cinnamon 3 cups of chicken broth or vegetable broth 2 cups of unsweetened canned pumpkin 2 tablespoons of coconut sugar 1/3 cup of full fat coconut milk Salt & pepper to taste Directions: Preheat your oven to 350F. Make the granola by mixing all of the ingredients into a bowl. Place onto a sheet pan with parchment paper and spread evenly and let cook for 15-20 minutes until lightly browned. Turn the pan halfway through the cooking process. Set aside and let cool until ready to use. While the granola is baking, make the soup. Place a soup pot or Dutch oven on medium heat. Add the coconut and swirl to coat. Add the ginger, onion and cook briefly. Add the curry and garlic powder, thyme and cinnamon. Add the and apple and cook until slightly softened. Add in the broth, pumpkin and coconut sugar. Bring to a light boil and then bring to a simmer. Cover with a lid and allow the flavors to blend for 15-20 minutes. Once the soup has cooked for the allowed time. Take off the heat. Place the soup into a blender a puree until smooth. Place back into the pot and then add the coconut milk. Allow to cook for another five minutes. Adjust the seasoning as necessary with salt and pepper. Serve and top with savory granola.  Salmon Corn Chowder
(Serves 6) 1 cup per serving Ingredients: 2 tablespoons of coconut oil or light olive oil 1 celery stalk, chopped 1 onion, chopped 1 carrot, chopped 1/4 cup of flour 3 cups of plant based milk (soy, almond, cashew) or 2 cups of evaporated milk (If using evaporated milk, add additional 1 cup of vegetable stock or water) 3 cups of vegetable stock or water 1 teaspoon of old bay seasoning 1/2 tablespoon of garlic powder 1/4 teaspoon of ground pepper 1 teaspoon of dried thyme 1 cup of frozen corn, unthawed 1 can of pink salmon, drained, bones & silver skin removed 2 tablespoons of fresh parsley for garnish (optional) Directions: In a large soup pot, over medium heat add the oil. Add in the chopped celery, carrot and onion. Cook until softened. Sprinkle in the flour and cook until slightly toasted which should take 1-2 minutes. Using a whisk, add in the milk and stir until the liquid has slightly thickened. Add in the stock or water and rest of ingredients except the corn and salmon. Bring to a simmer and cook for 5 minutes. Add in the corn and flake in the salmon. Sprinkle with parsley if using. Serve. "I received free samples of Cabot Cheese mentioned in this post. By posting this recipe, I am entering a recipe contest sponsored by Cabot Cheese and I am eligible to win prizes associated with the contest, I was not compensated for my time." This recipe is a twist for a favorite popular Spanish dish called "Arroz con Pollo" (Spanish Rice & Chicken) I love making this traditional dish and thought it would be tasty to create a family friendly recipe using ground chicken and cheese, which in this case is the Vermont Sharp cheddar cheese from Cabot. 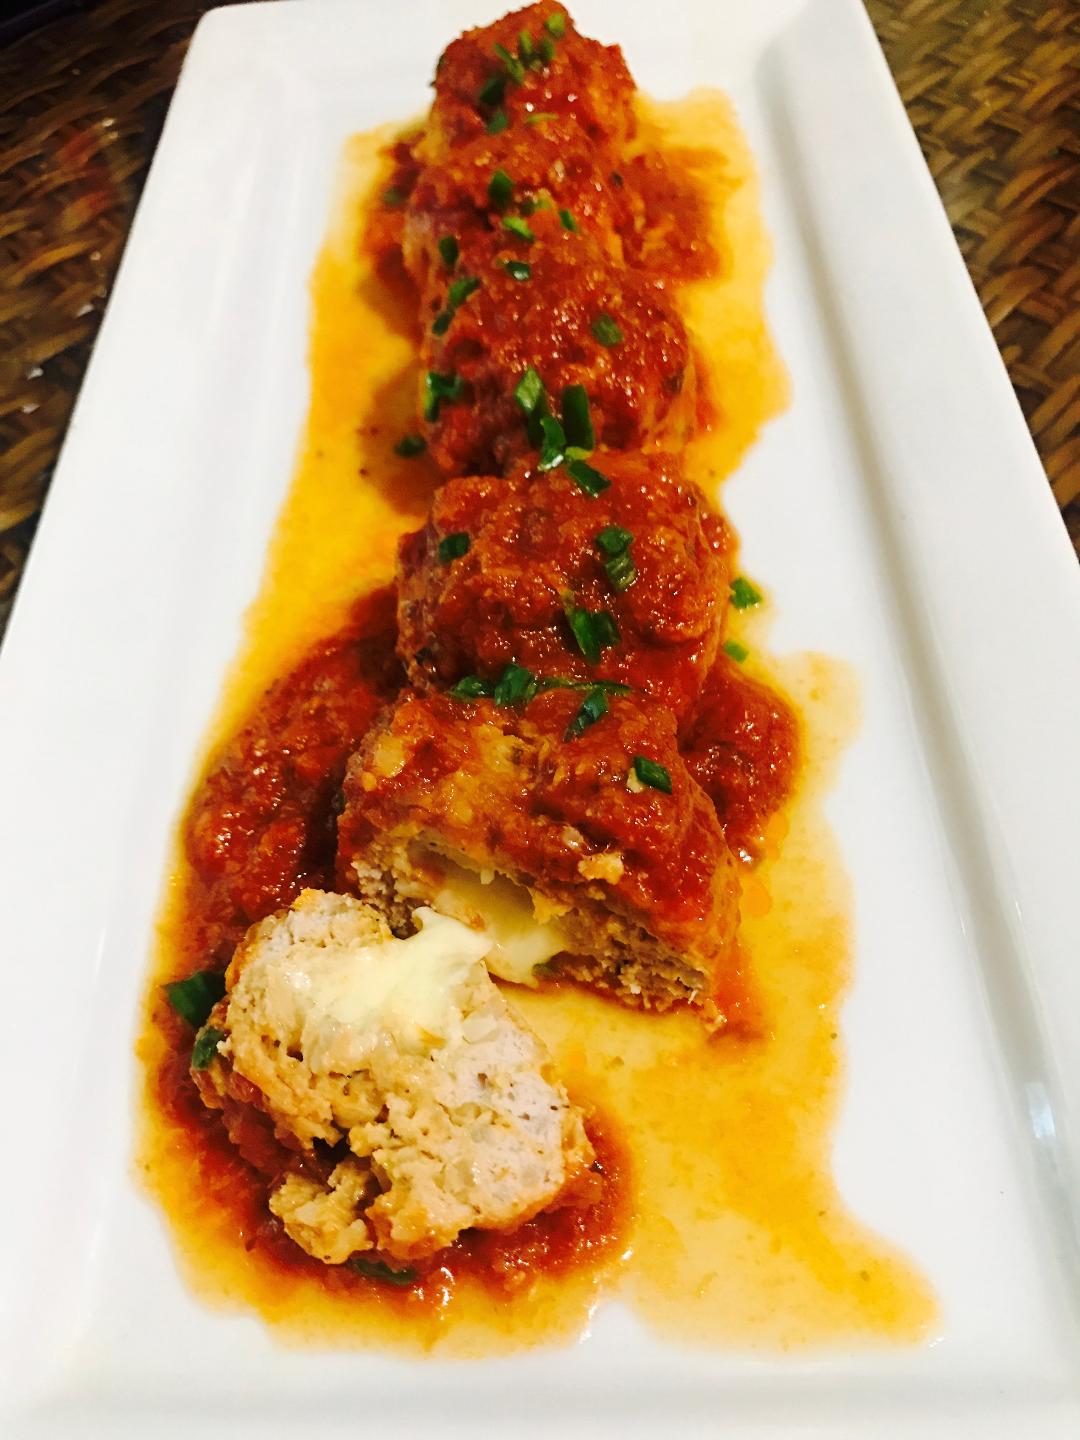 Instead of bread crumbs to bind the meatballs, cooked brown rice is used. The delicious sofrito marinara sauce comes together quickly but is bursting with flavor .Another flavorful and economical ingredient I added is "azafran" It is a budget saffron that brings delicious flavor also to this dish that you can easily find at a international or Caribbean grocery store for about $2 or less. This recipe yields a good amount of sauce useful for dipping with the baked plantains. Enjoy! 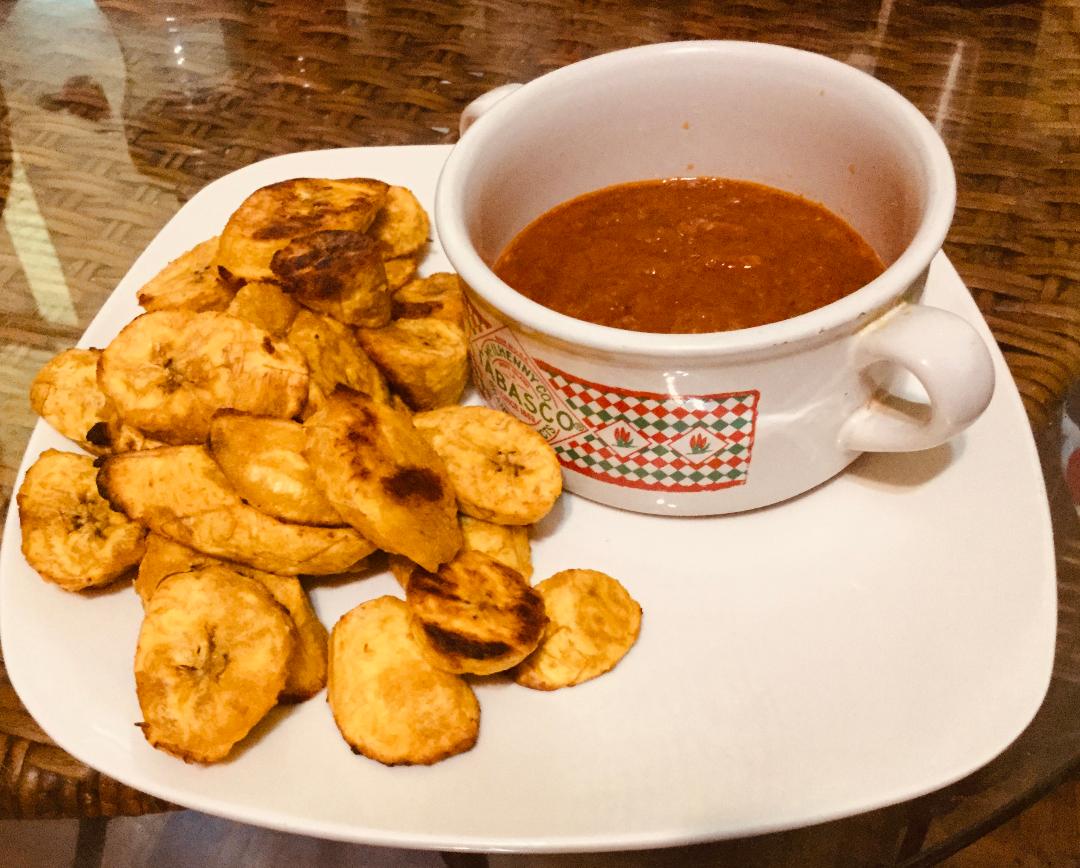 Ingredients: (Meatballs) 1 pound of ground chicken 2 tablespoons of water 1 egg, lightly beaten 3/4 cup of cooked brown rice 1 tablespoon of garlic powder 1 teaspoon oregano 1 teaspoon of kosher salt 1 teaspoon of Spanish smoked paprika 4 ounces of Cabot Vermont Sharp Cheddar cheese, cut into small cubes (Sofrito Marinara Sauce) 1 small green bell pepper 3 large cloves of garlic 1 small red onion 1 small bunch of fresh cilantro 2 tablespoons of extra virgin olive oil 1 28 ounce can of crushed tomatoes 1 1/2 teaspoons of kosher salt or to taste 1 teaspoon of Spanish smoked paprika 2 teaspoons of azafran (optional) (Baked Plantains) 4 green plantains, peeled and sliced thick on the diagonal 2 tablespoon of extra virgin olive oil 1 teaspoon of kosher salt 1/2 tablespoon of granulated garlic powder Directions: Preheat oven to 350F. To make the meatballs, in a medium sized bowl, combine all the meatball ingredients except the cheese and gently combine using your hands. Using your thumb, place a few cubes into each meatball and then gently pull the ground meat over the cheese. Continue this process until you have used all the cheese and completed 12 meatballs. Place the prepared meatballs onto a sheet pan and cook for 12-15 minutes until juices run clear. While the meatballs are cooking, prepare the sofrito marinara sauce. Make the sofrito by combining the green pepper, garlic, onion and cilantro into a blender until slightly smooth. Use a little water as necessary to bring it to a paste. Set aside. Using a saute pan, bring to medium heat and add the olive oil. Swirl the pan to coat. Add the prepared sofrito and cook until fragrant which should take a few minutes. Add the canned crushed tomatoes, salt and, smoked paprika and azafran, if using. Bring to a slight simmer and continue to bring the flavors together for 10 minutes. After the sauce has cooked for 10 minutes. Add the baked meatballs and continue to cook for another 10 minutes. Lastly, while the sauce and meatballs are cooking, prepare the baked plantains by tossing with the olive oil, garlic powder and salt and place into a 400F oven until browned. Should take 8-10 minutes. For each serving, place 3 meatballs onto a plate along with a generous amount of the sauce. Use the extra sauce to be served with the baked plantains. Serve. These are hearty muffins great for a grab and go snack or paired up at breakfast as a healthier option. Packed with protein with Greek yogurt, moistened with pumpkin puree and lots of fiber with oats with the addition of a favorite of mine, Lucuma powder.  Makes 12 muffins
Ingredients: (Wet) 1/2 cup of pumpkin puree 2 eggs (preferably organic) 2 tablespoons of pure maple syrup 1 cup of full fat plain Greek yogurt 1/2 cup of plant based milk of your choice(no sugar added) 1 tablespoon of coconut oil (Dry) 1 cup of toasted oat flour (you can purchase at Anson mills.com) 1/2 cup of quick cooking oats 1/4 cup of whole wheat pastry flour 1/4 cup of organic Lucuma powder 1/2 teaspoon of baking soda 1 1/2 teaspoons of baking powder 1/2 teaspoon of cinnamon 1/2 teaspoon of nutmeg 1/2 teaspoon of ginger (Fold in) 1/4 cup of dark chocolate chips 1/4 cup of dark raisins Directions: Preheat oven to 350F. In a mixing bowl, mix the wet ingredients together using a whisk. Set aside. In a large mixing bowl, combine the dry ingredients and whisk together to combine. Add the wet ingredients to the dry and mix until just combined. (Do not overmix to prevent the muffins from getting tough. Fold in the chocolate chips and raisins. Oil a muffin pan or use muffin liners. Scoop about 1/4 cup evenly for each muffin. Place into a preheated oven for 15 to 20 minutes or until a toothpick inserted in the middle comes out clean. This dish is my go to whenever I want a simple, but flavorful dish with lots of veggies. i used a medley of fresh peppers, carrots, onions and broccoli, but you can use any fresh vegetables of your choice. 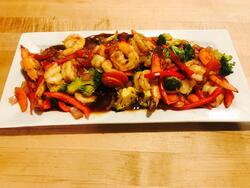 Serves 4
(About 1 1/2 cups per serving) Ingredients: (Sauce) 1 cup of reduced sodium chicken broth 1 tablespoon of reduced sodium soy sauce 1 tablespoon of coconut sugar or dark brown sugar 1 tablespoon of black vinegar, or apple cider vinegar 1/2 teaspoon of fish sauce (optional) 1 teaspoon of siracha 1 tablespoon of cornstarch (Stir Fry) 2 tablespoons of avocado oil (divided) 2 tablespoons of freshly grated ginger 3 cloves of garlic, minced 1 pound of large, wild caught shrimp, peeled and deveined,, tails intact 3 cups of broccoli 1 carrot, sliced thinly 1 red onion, roughly chopped 1 large red bell pepper, sliced Directions: Place all of the sauce ingredients into a small bowl and whisk to combine. Set aside. Place a wok or large skillet over medium high heat. Add 1 tablespoon of the avocado oil and swirl to coat the pan. Add the ginger and garlic until fragrant for 30 seconds or so. Add in the shrimp and cook for a couple of minutes until almost cooked. (It will continue to cook as you prepare the rest of this recipe and will be added at the end.) Place onto a plate and set aside. Add the remaining 1 tablespoon of avocado oil to the pan and add the broccoli and carrot. Saute for a minute or so. Add a couple of tablespoons of water if needed to soften the broccoli and carrots. Add it the red onion and red bell peppers and cook for another minute or so. Add the sauce to the pan and add the shrimp back into the pan. Continue to cook for another minute or so until the sauce thickens with the shrimp and vegetables. Serve with grain of your choice. This dish is a simple take on mussels which is very easy to prepare. The broth is super flavorful with curry powder with a splash of coconut milk. Great as an appetizer. 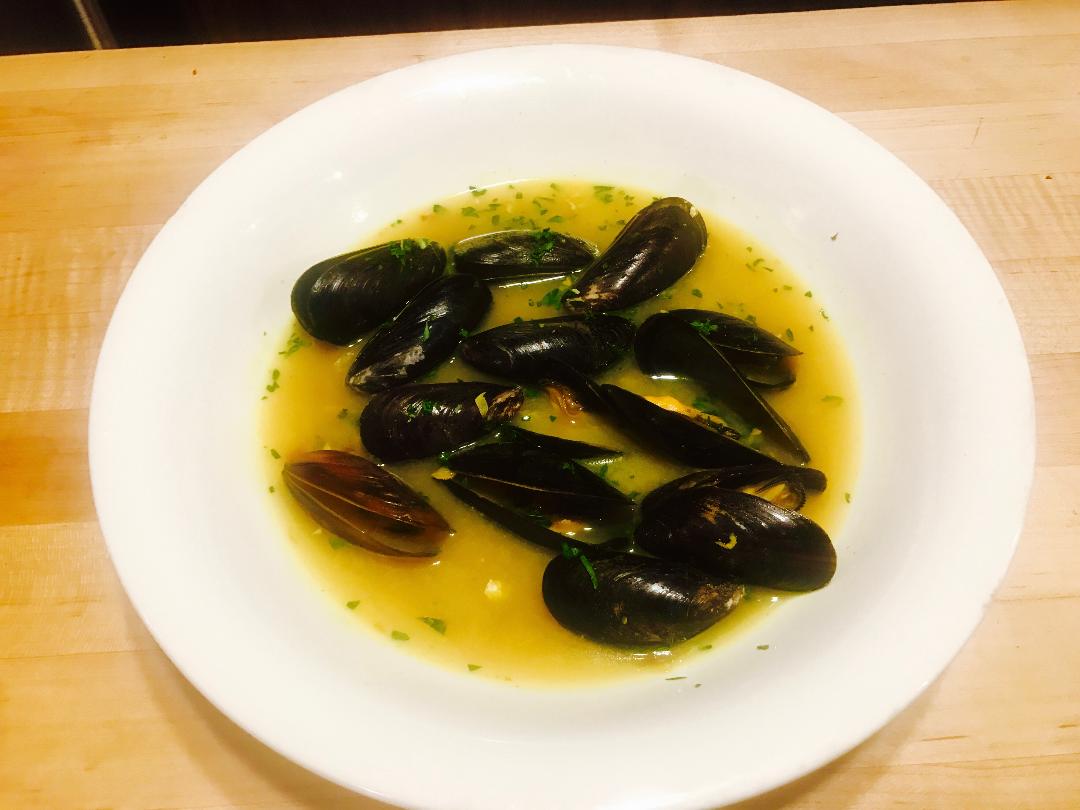 Serves 4
1/2 pound per serving Ingredients: 2 pounds of cleaned mussels 1 tablespoon of coconut oil, unrefined 2 cloves of garlic, minced 2 tablespoons of fresh grated ginger 1 small red onion, chopped 1 small habanero pepper, minced (seeds removed) 1/2 tablespoon of Jamaican curry powder 1 tablespoon of coconut sugar 1/4 cup of dry white wine 2 cups of chicken broth 1/4 cup of full fat coconut milk Juice of 1 lime Directions: In a large pot or dutch oven, add the coconut oil over medium high heat. Add the garlic, ginger and onion until lightly browned for 2-3 minutes. Add in the habanero pepper,curry powder and coconut sugar and cook for another minute. Add in the white wine to deglaze the pan and cook for another couple of minutes. Add in the broth and coconut milk and bring to a boil. Then add the mussels and stir the mixture so that it coats the mussels. Cover the pot and reduce to a simmer and cook for 8-10 minutes or until the mussels open up. Discard any that do not open. To finish, squeeze fresh lime juice into the pot and stir again. Serve. |
Archives
May 2024
Categories
All
|
 RSS Feed