Recipes
|
|
|
|
 Disclosure: This blog post may contain affiliate links, which means I may earn a commission if you click on the link and make a purchase. However, rest assured, the products or services recommended here are ones I genuinely believe in and have personally tested or researched. Your support through these links helps keep this site running and allows me to continue providing valuable content. Thank you for your support!" I'm always on the lookout for natural alternatives for health and I discovered a while back about Sea Moss. It has numerous wonderful health benefits, and it has a lot of versatility in the kitchen and beyond. One of the benefits I've enjoyed is better digestive health since incorporating sea moss gel into my diet. Sea moss is commonly referred to as "Ocean's Elixir," and sea moss gel is derived from a type of seaweed known as Irish moss. It is packed with essential minerals, vitamins, and antioxidants. This superfood has gained popularity with a wide range of potential health benefits, and you'll understand why you should make this simple homemade recipe to unlock its power. The Health Benefits of Sea Moss Gel:
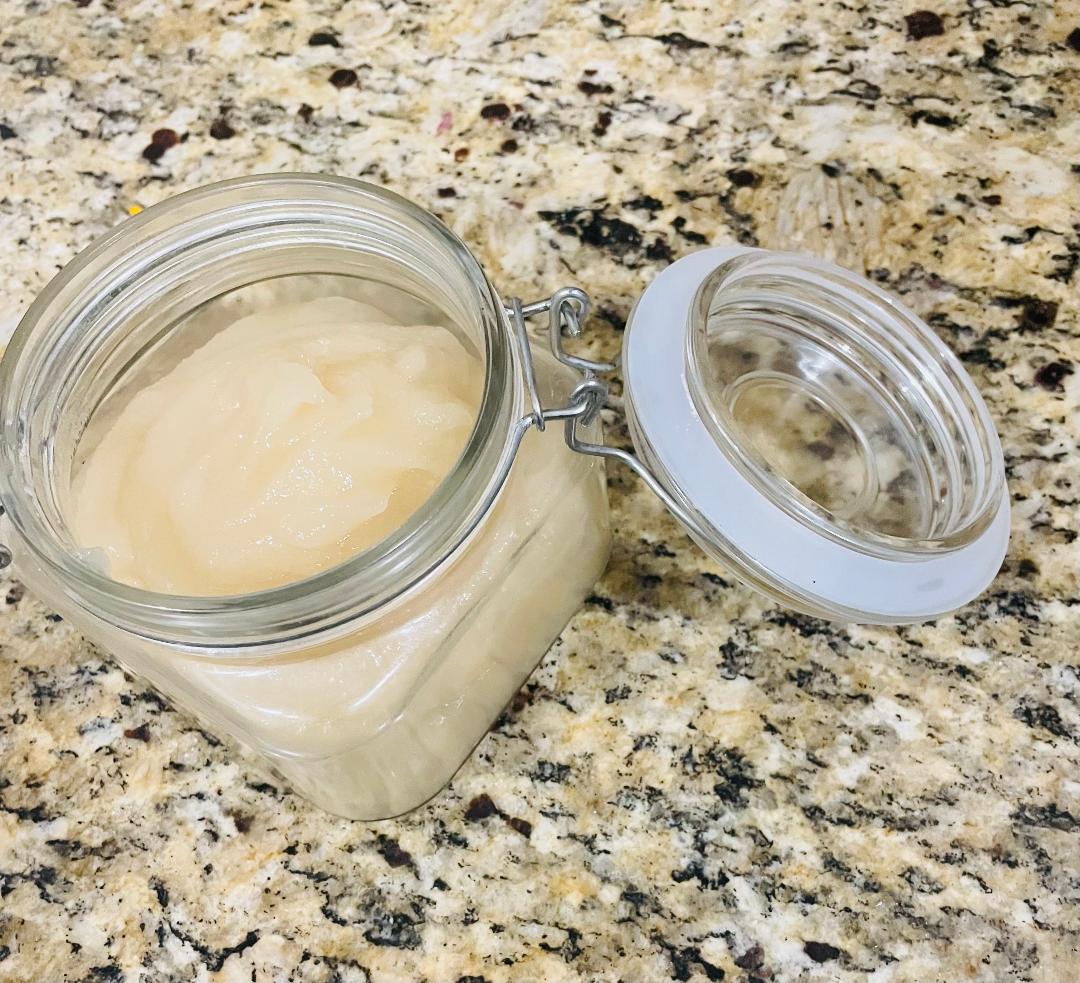
Making Sea Moss Gel at Home: Now that you know some of the important benefits of sea moss, you want to make sure you are getting a quality product. I use a wildcrafted dry sea moss harvested from Saint Lucia from Red's Pure Botanical's. It is a good product with no fishy smell like some sea moss that I've used in the past and has a clean scent. Ingredients: 1/2 cup dried sea moss 4 cups filtered water Directions: Rinse the dried sea moss thoroughly to remove any salt or debris. Soak the sea moss in filtered water for 4-6 hours or overnight. This will rehydrate the sea moss and remove any impurities. 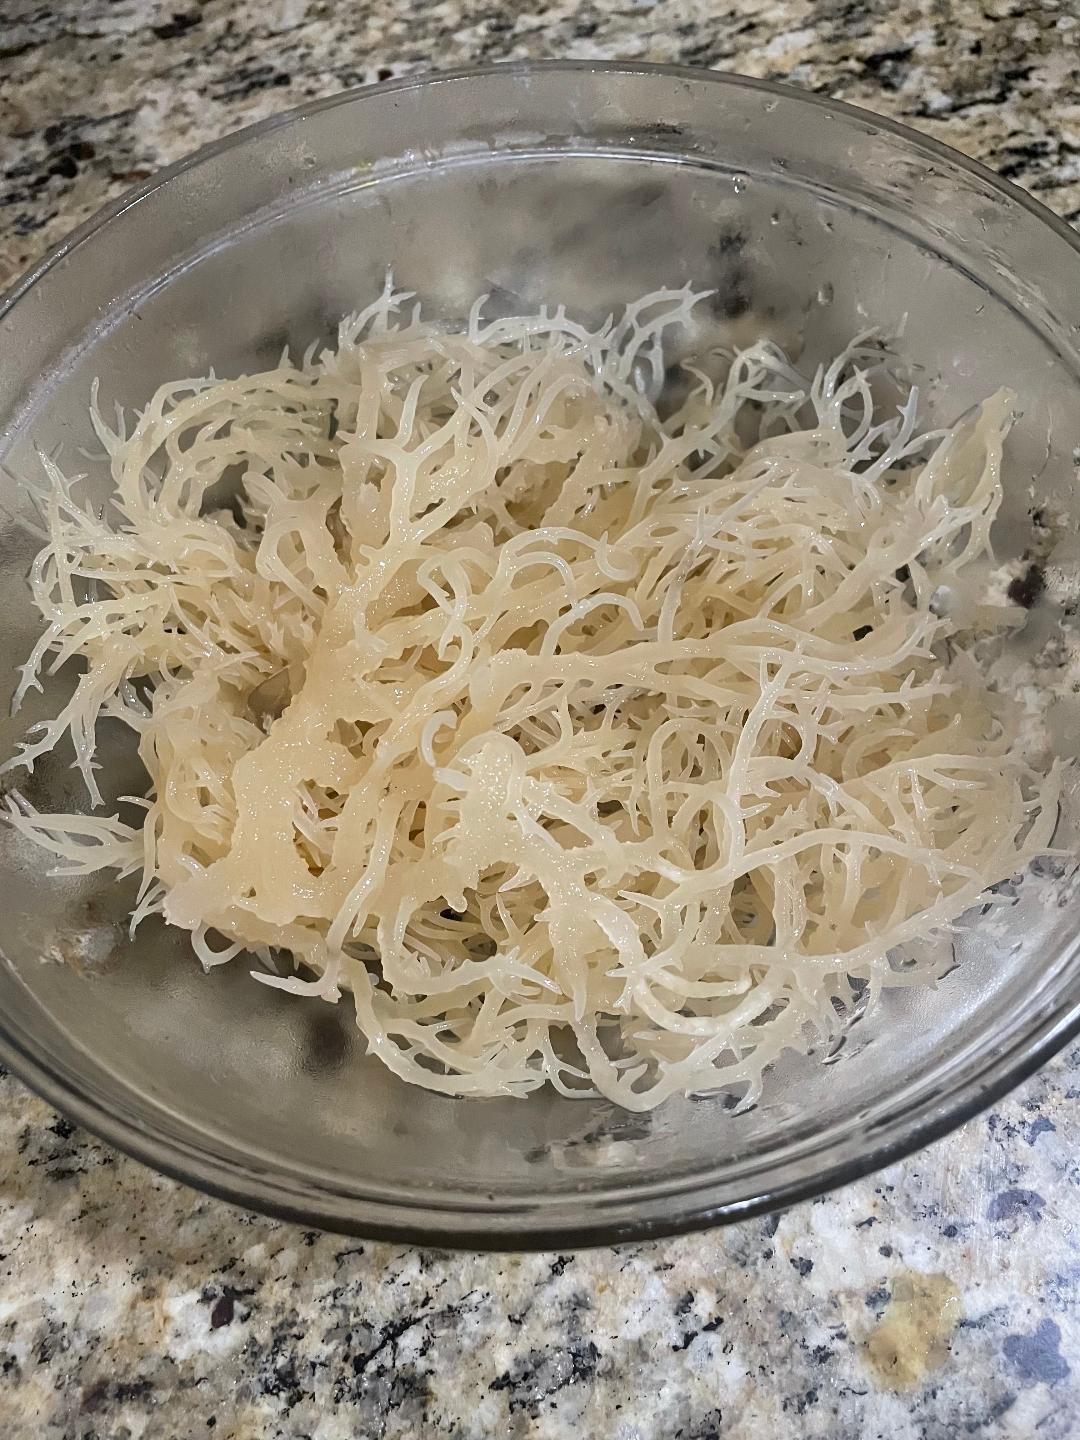 After soaking, the sea moss will expand and become soft. Drain the soaking water and rinse the sea moss again. In a blender, combine the soaked sea moss with 4 cups of fresh filtered water. Blend on high speed until smooth and creamy, scraping down the sides of the blender as needed 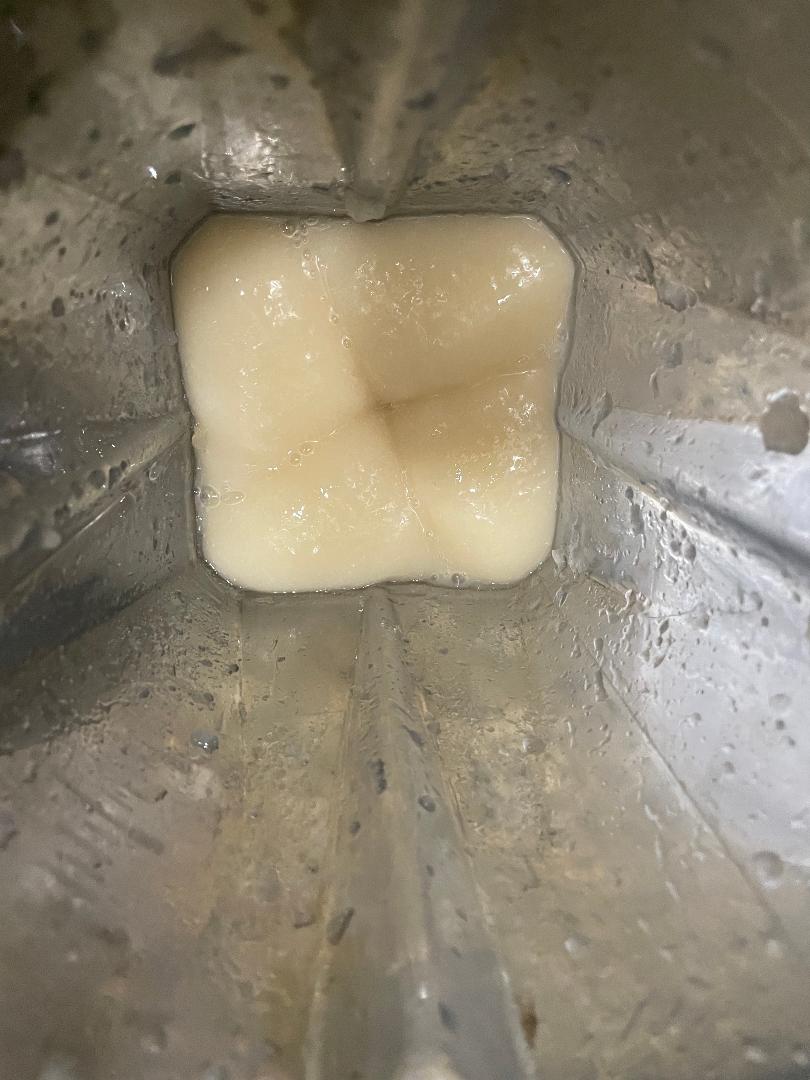 Transfer the blended mixture to a clean glass jar or container. Store the sea moss gel in the refrigerator for up to two weeks. Incorporating Sea Moss Gel into Your Routine: Once you've made your sea moss gel, there are numerous ways to incorporate it into your daily lifestyle. Try adding a spoonful to smoothies, juices, soups, sauces, or desserts for an extra boost of nutrients. You can also use it as a thickening agent in salad dressing or as a thickener for a healthy homemade jam using fresh berries. It's also delicious in this Vegan Jamaican Irish Sea Moss that's almost dessert like but you don't have to feel the guilt because it's good for you and has anti-inflammatory properties. This drink is sweetened with dates and dusted with cinnamon and nutmeg. Sea moss gel is also an excellent option as a natural face mask for glowing skin to keep it young looking. No expensive facial creams needed! Sea moss gel, or "Ocean's Elixir," is a powerhouse of nutrients with numerous health benefits. By making your own sea moss gel at home, you can unlock its potential for better health and harness its power to support your overall well-being. The upside also by making your own, it is a lot more economical! Whether you're looking to boost your immune system, support thyroid health, improve digestion, or enhance your skin, sea moss gel offers a natural and easy solution to use in many ways. Try incorporating sea moss gel into your daily routine and experience the transformative benefits of this oceanic superfood.
0 Comments
 Lately, I've been getting into making my own homemade plant-based milk because I'm not crazy about all the additives added in commercial brands include gums.
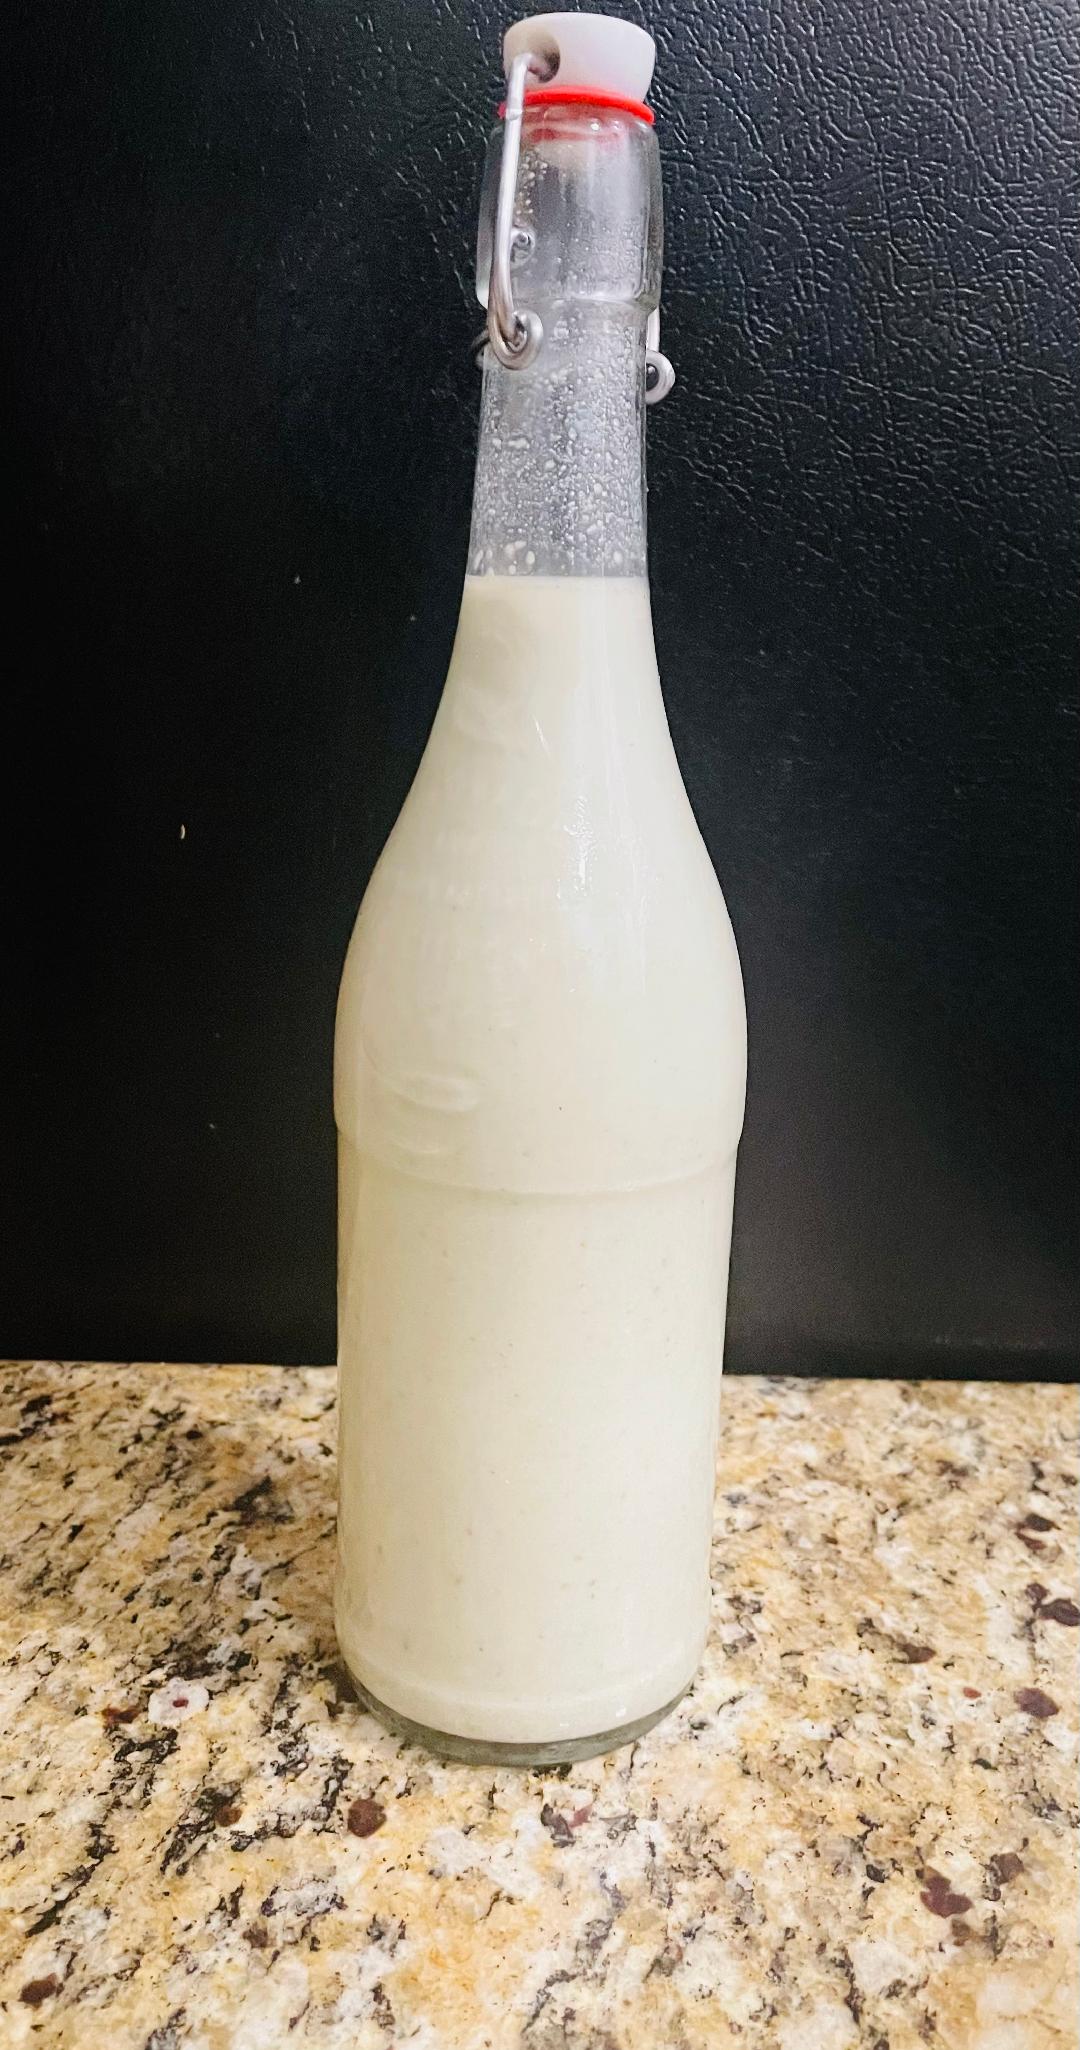
I love making almond milk, but it's on the pricier side and I also have to strain the milk from the solids using a nut bag. So, a nutrient packed alternative for me at times, is pumpkin seed milk which is a more economical option, and I don't have to strain. The flavor profile is really on point which has a creamy texture and is great for those of you who can't do nuts. This pumpkin seed milk can last for up to 5 days. Enjoy! Pumpkin Seed Milk Makes 4 cups Ingredients: 1/2 cup of roasted pumpkin seeds 3 1/2 cups of cold water 2 pitted dates pinch of salt 1 teaspoon of vanilla Directions: Place all ingredients into a blender and blend until smooth for about 1 minute. Place into a glass container of your choice. This fresh milk will last around 5 days. 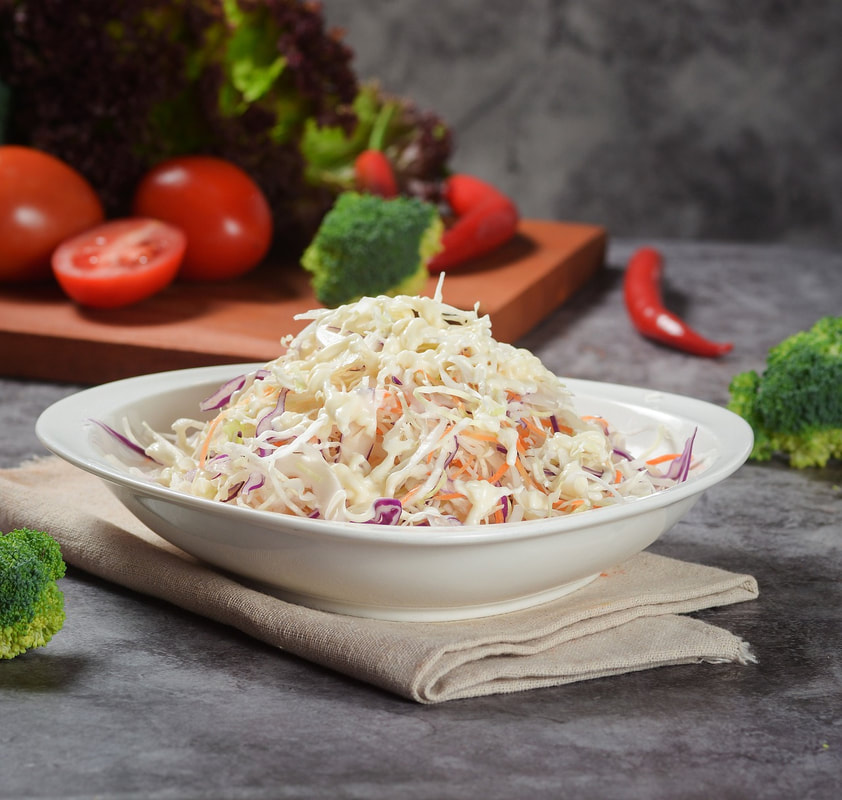 Cabbage is a great way to vary your traditional salad. I got this idea to make this recipe from a local Mediterranean market that would make this salad often for their customers. What's also great about this type of salad is that it tastes better as it marinates. It also stays delightfully crunchy.
I love this salad because it is refreshing. This salad can become more of a feast for the eyes if you want to use a combination of red and green cabbage. This is a nutrient dense salad you can serve along with your favorite protein. Whether you're looking for a light side dish or a refreshing appetizer, this salad is sure to leave you craving for more. Ingredients: (Dressing) 1/4 cup extra virgin olive oil Juice of 1 lemon 1 teaspoon of garlic powder Salt & pepper to taste (Salad) 1 small head of cabbage, thinly sliced 1 /2 cup of fresh mint or 1 1/2 teaspoons dried 1/2 red onion, thinly sliced 1/2 cup of fresh flat leaf parsley Instructions: Wash the cabbage thoroughly and remove any wilted outer leaves. Slice the cabbage thinly using a sharp knife or a mandolin slicer. If using fresh mint, rinse under cold water and pat them dry with a paper towel. Chop the mint leaves finely, discarding any tough stems. Peel and thinly slice the red onion and chop up the parsley. Place all of the chopped ingredients to a large bowl. Make the dressing: In a small bowl, whisk together the olive oil, lemon juice, until well combined. Season the dressing with salt and pepper to taste. Adjust the seasoning according to your preference. Complete the Salad: Pour the dressing over the salad ingredients, tossing gently to coat everything evenly. Allow the salad to marinate for about 10-15 minutes to allow the flavors to meld together. Once the salad has had time to marinate, give it a final toss to ensure that the dressing is evenly distributed. Transfer the salad to a serving dish or individual plates. 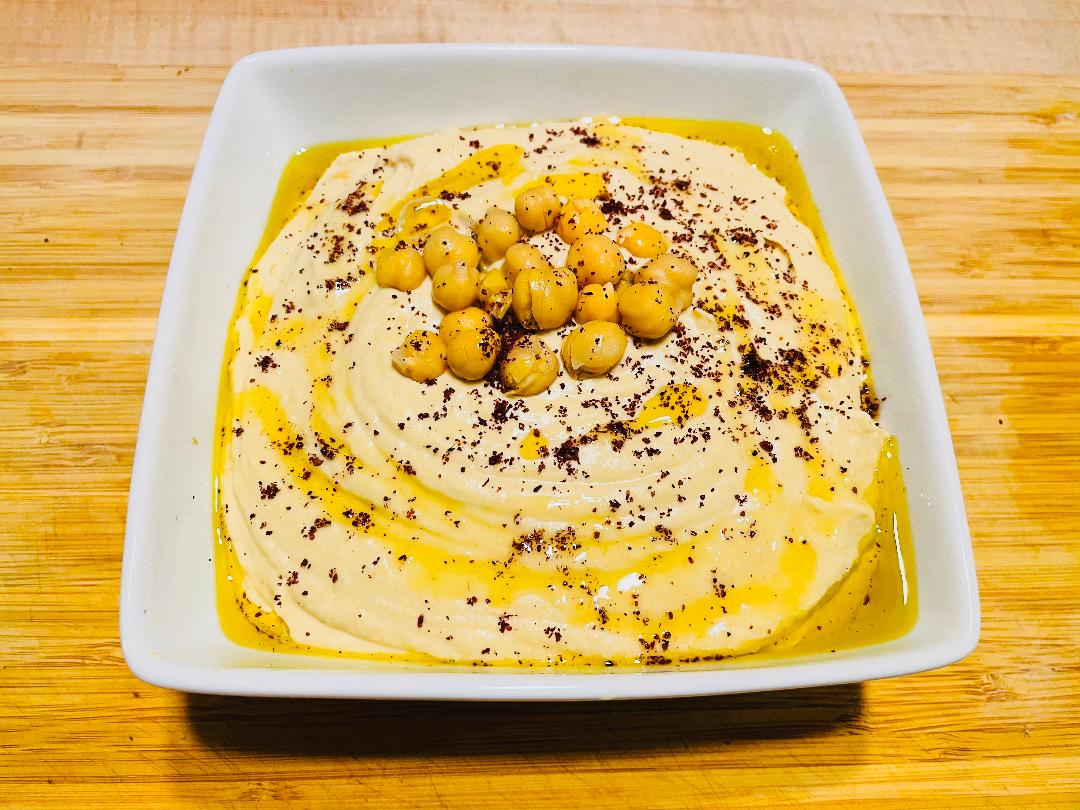 "Disclosure: This blog post may contain affiliate links, which means I may earn a commission if you click on the link and make a purchase. However, rest assured, the products or services recommended here are ones I genuinely believe in and have personally tested or researched. Your support through these links helps keep this site running and allows me to continue providing valuable content. Thank you for your support!" Even when I get extremely busy, I rarely want to purchase store bought hummus.
I'm not against purchasing a good quality one, but making your own flavor wise is so much better! Here is my recipe which is traditional using canned chickpeas, but enhanced with roasted garlic. I used a whole head to really capture the flavor. Don't worry about the garlic being too over the top as roasted garlic is more mellow in taste than raw. To make a really good hummus, it all starts with the ingredients. You can use canned chickpeas, but good quality Tahini makes a difference. I have personally been using Beirut Tahini for many years and this particular tahini has just the right consistency of smoothness and delicious flavor that never fails. Also, I like to top off my hummus with sumac, which is a spice made from dried and ground berries of the sumac shrub native to the Middle East and Mediterranean regions. The flavor of sumac has a tangy sour taste similar to lemon, but this spice can be used in other recipes such as salad dressings and marinades. It's also a prominent spice used in popular spice blends like za'atar. Enjoy this simple recipe with fresh pita bread, olives or your favorite cut up raw veggies. Enjoy! Roasted Garlic Hummus Ingredients: 1 head of garlic, roasted 1 can of chickpeas, rinsed (reserve 1/4 cup liquid) Also save a few chickpeas for garnish Juice of 1 lemon 1/4 cup of Beirut tahini 1/2 teaspoon of cumin 1 teaspoon of Spanish smoked paprika 1/2 teaspoon of salt or to taste 2 tablespoons of extra virgin olive oil Extra olive oil for finishing Sumac (optional for finishing) Directions: Preheat oven to 400 F. Roast the garlic, by cutting off the top of the garlic and sprinkle with salt and pepper wrapped tightly in aluminum foil. Cook for 30 mins or until golden brown in color. For a detailed quick video on how to do this watch this "Perfect Oven Roasted Garlic Video." Once the garlic is roasted add to a food processor or blender along with the rest of the ingredients. Blend the mixture until in becomes smooth in texture. Transfer to a bowl and drizzle with additional olive oil and place the reserved chickpeas on top as a garnish. Sprinkle with sumac if desired. Serve.  Chicken Kabobs is something I enjoy making a lot especially when I want to get enough protein into my meals. They can be seasoned in a variety of ways and when you prepare them outdoors on a grill, chicken kabobs have outstanding flavor! However, my recipe will reflect on using your oven or indoor grill for convenience. I drew inspiration for this recipe from a Mediterranean market I would purchase ingredients from. Sumac is an ingredient that is optional in this recipe but it adds additional color and flavor. Although this recipe uses simple ingredients, it packs lots of flavor. I use lean chicken breast, but chicken tenders can also be used. The yogurt marinade keeps the chicken moist and tender. The longer the marination, the more the flavor develops. Chicken Kabobs Serves 4 (Marinade) 1 cup of plain Greek Yogurt 2 tablespoons olive oil 2 cloves garlic, minced Juice of 1 lemon 1 teaspoon paprika ½ teaspoon cumin 1 teaspoon salt 1/2 teaspoon black pepper ½ cup of fresh parsley, chopped (Rest of Ingredients) 1 pound boneless, skinless chicken breasts, cut into 1-inch cubes or chicken tenders 1 bell pepper, cut into chunks 1 red onion, cut into chunks Wooden skewers (soak them in water for 30 minutes before using to prevent burning) Sumac (for garnishing, optional) Instructions: Preheat your oven to 400°F. In a small bowl, mix the yogurt, olive oil, minced garlic, paprika, cumin, salt, and black pepper to create a marinade. Place the chicken cubes in a large bowl and pour the marinade over them. Toss the chicken until evenly coated. Let it marinate for at least 15-20 minutes and up to 3 hours or overnight. While the chicken is marinating, prepare your vegetables. Thread the marinated chicken, bell pepper and onions onto the wooden skewers, alternating between the ingredients. Place the skewers on a baking sheet lined with parchment paper or aluminum foil to prevent sticking. Bake in the preheated oven for 20-25 minutes or until the chicken is cooked through and the vegetables are tender, turning the skewers halfway through cooking. Once cooked, remove the skewers from the oven and let them cool for a few minutes. Garnish with sumac if desired. Serve. *If doing these on an indoor grill with two plates, the kabobs will cook more quickly and will cook in half the time. 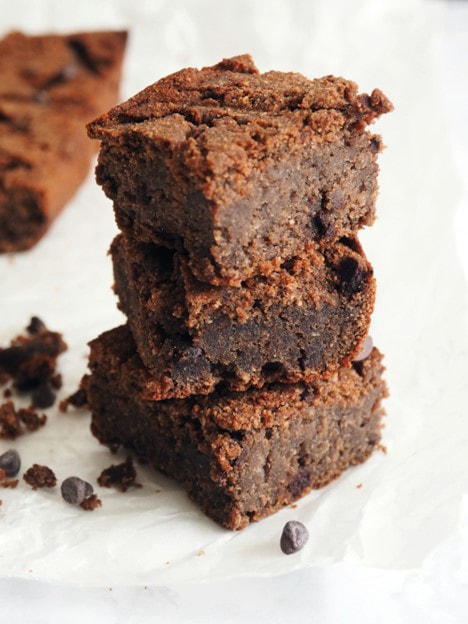 Brownies are an all-time classic favorite when it comes to comfort foods but now you can indulge guilt-free with this tasty healthy black bean brownie recipe!
This recipe is a delightful twist on a classic treat. Discover how to effortlessly incorporate nutrient-rich black beans into your baking for a moist texture. These brownies are a perfect balance of sweetness, making these brownies a must-have for any health-conscious dessert lover. Ingredients: 1 can (15 oz) black beans, drained and rinsed 2 large eggs 1/4 cup cocoa powder 1/2 cup whole wheat pastry flour 1/4 teaspoon salt 1/2 cup honey or maple syrup (date paste can also be used instead) 1/4 cup butter flavored coconut oil or another neutral oil 1 teaspoon vanilla extract 1/2 teaspoon baking powder 1/2 cup dark chocolate chips or cacao nibs (optional) Instructions: Preheat your oven to 350°F (175°C). Grease a baking pan or line it with parchment paper. In a food processor, combine black beans, eggs, cocoa powder, whole wheat pastry flour, salt, natural sweetener of your choice, coconut oil, vanilla extract, and baking powder. Blend until smooth and well combined. You may need to scrape down the sides of the food processor to ensure everything is mixed evenly. If using, stir in the dark chocolate chips or cacao nibs into the batter. Pour the batter into the prepared baking pan and spread it out evenly. Bake in the preheated oven for 20-25 minutes, or until a toothpick inserted into the center comes out clean. Allow the brownies to cool in the pan for at least 10 minutes before slicing and serving. 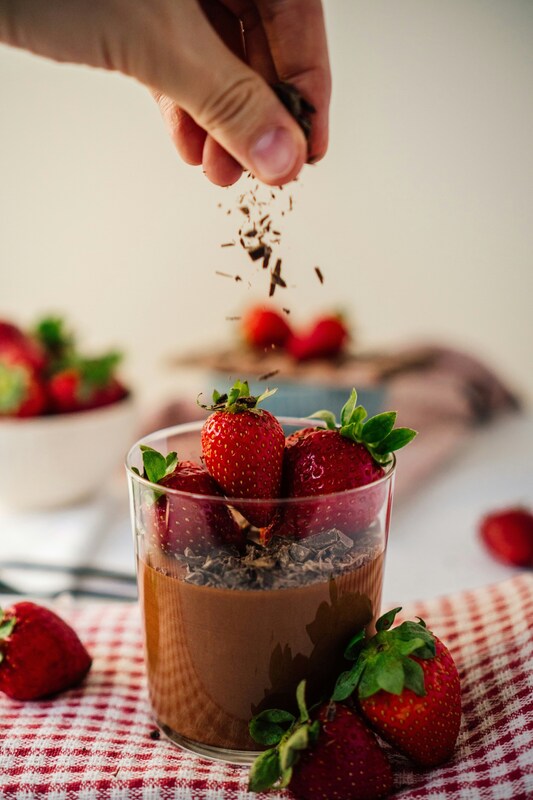 Avocado chocolate mousse is a creamy, decadent dessert made with ripe avocados, cocoa powder, and a natural sweetener like maple syrup or honey.
But in this recipe, I use carob molasses which takes on a chocolate note, common in Mediterranean cuisine. The ingredients are blended until smooth and silky, resulting in a rich chocolate flavor with a hint of avocado. It's a healthier alternative to traditional mousse, as avocados provide a creamy texture without the need for heavy cream or eggs. This dessert is perfect for those looking for a guilt-free indulgence or anyone with dietary restrictions, as it's naturally vegan and gluten-free. Ingredients: 2 ripe avocados 1/4 cup cacao powder or cocoa powder 1/4 cup of carob molasses (sub maple syrup or honey if necessary (adjust to taste) 1 teaspoon vanilla extract Pinch of salt Optional toppings: cacao nibs, coconut whipped cream, berries, chopped toasted nuts Instructions: Cut the avocados in half, remove the pits, and scoop the flesh into a blender or food processor. Add cocoa powder, maple syrup or honey, vanilla extract, and a pinch of salt to the blender. Blend the mixture until smooth and creamy, scraping down the sides of the blender as needed to ensure everything is well combined. Taste the mousse and adjust sweetness if needed by adding your choice of sweetener. Once you've reached your desired taste and consistency, transfer the mousse to serving bowls or glasses. Chill the mousse in the refrigerator for at least 30 minutes to allow it to firm up. Serve the avocado chocolate mousse chilled, topped with coconut cream, berries, or chopped nuts if desired. Enjoy! Pesto is a classic recipe that is traditionally made with basil, pine nuts, garlic, olive oil with some variations with the addition of parmesan cheese. Here is a twist I made on a classic using hemp hearts, parsley for the herb with the addition of avocado. Because hemp hearts have a slight earthy taste, they are toasted and then the addition of roasted almonds brings this pesto together. Try using this spread on your favorite pasta, sandwich or even used as a base in salad dressing. 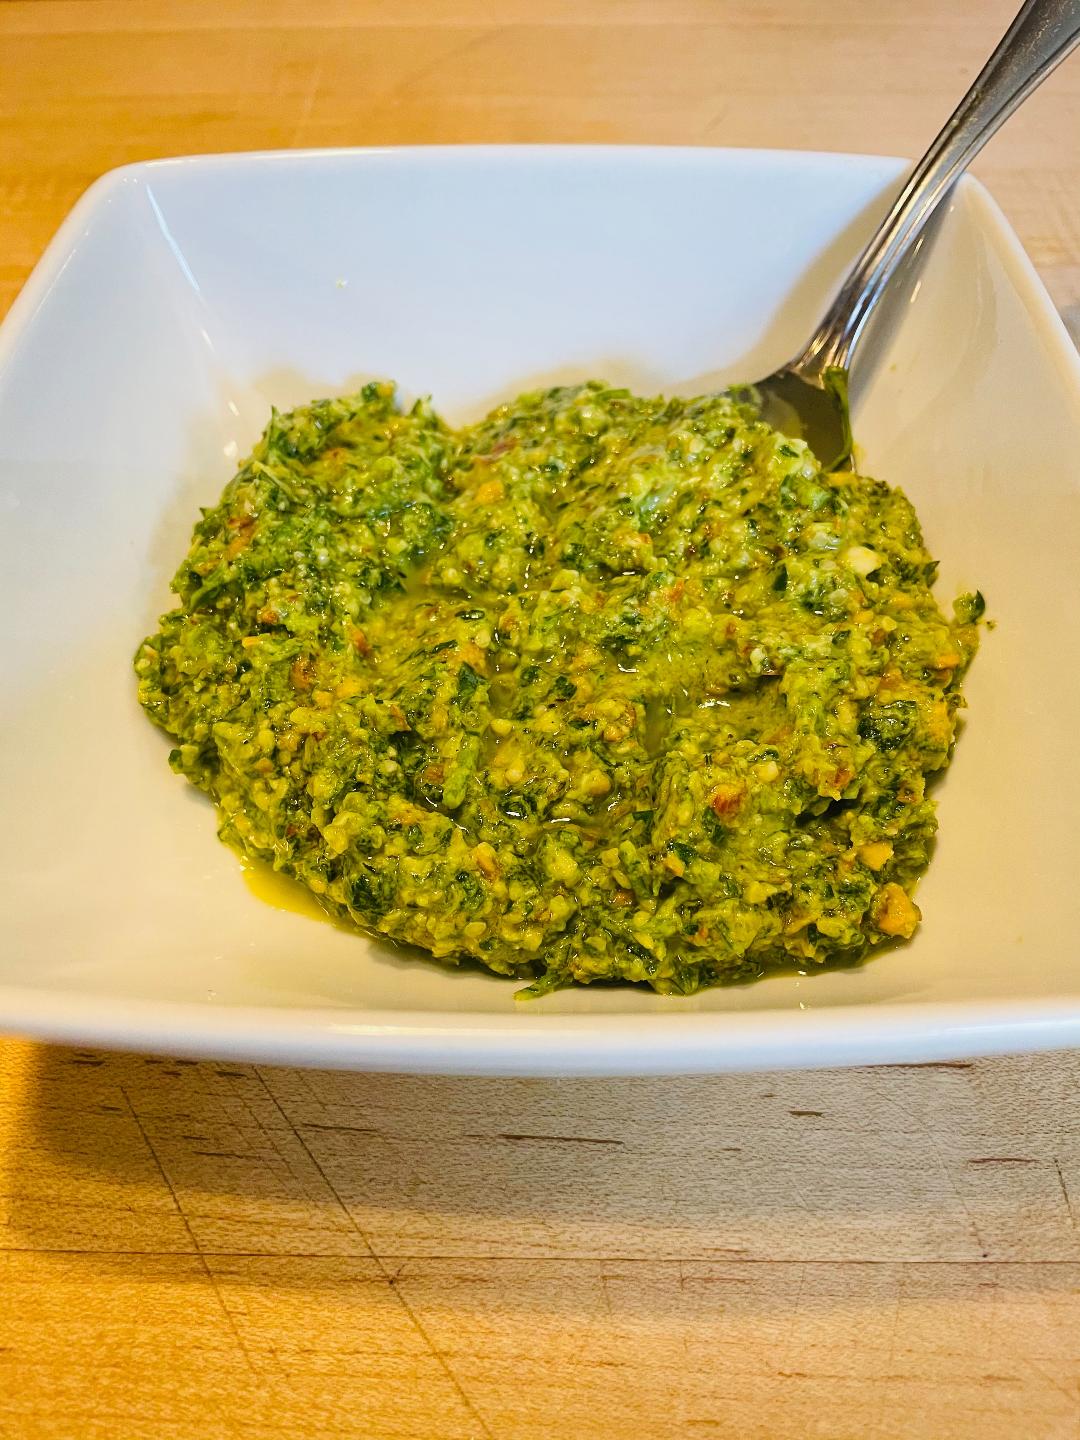 Ingredients: (Makes 1 1/2 cups) Juice of 1 lemon 1 cup of flat leaf parsley roughly chopped. (You can use the stems if you like) 1/2 of an avocado 1/4 cup of hemp hearts, toasted 1/4 cup of almonds, toasted 1 jalapeno, roasted 2 cloves of garlic 1 teaspoon of kosher salt or 1/2 teaspoon of sea salt 1/4 cup of extra virgin olive oil Directions: Add all of the ingredients to a food processor or blender, except the olive oil. Pulse until the mixture comes together and is slightly course in texture. 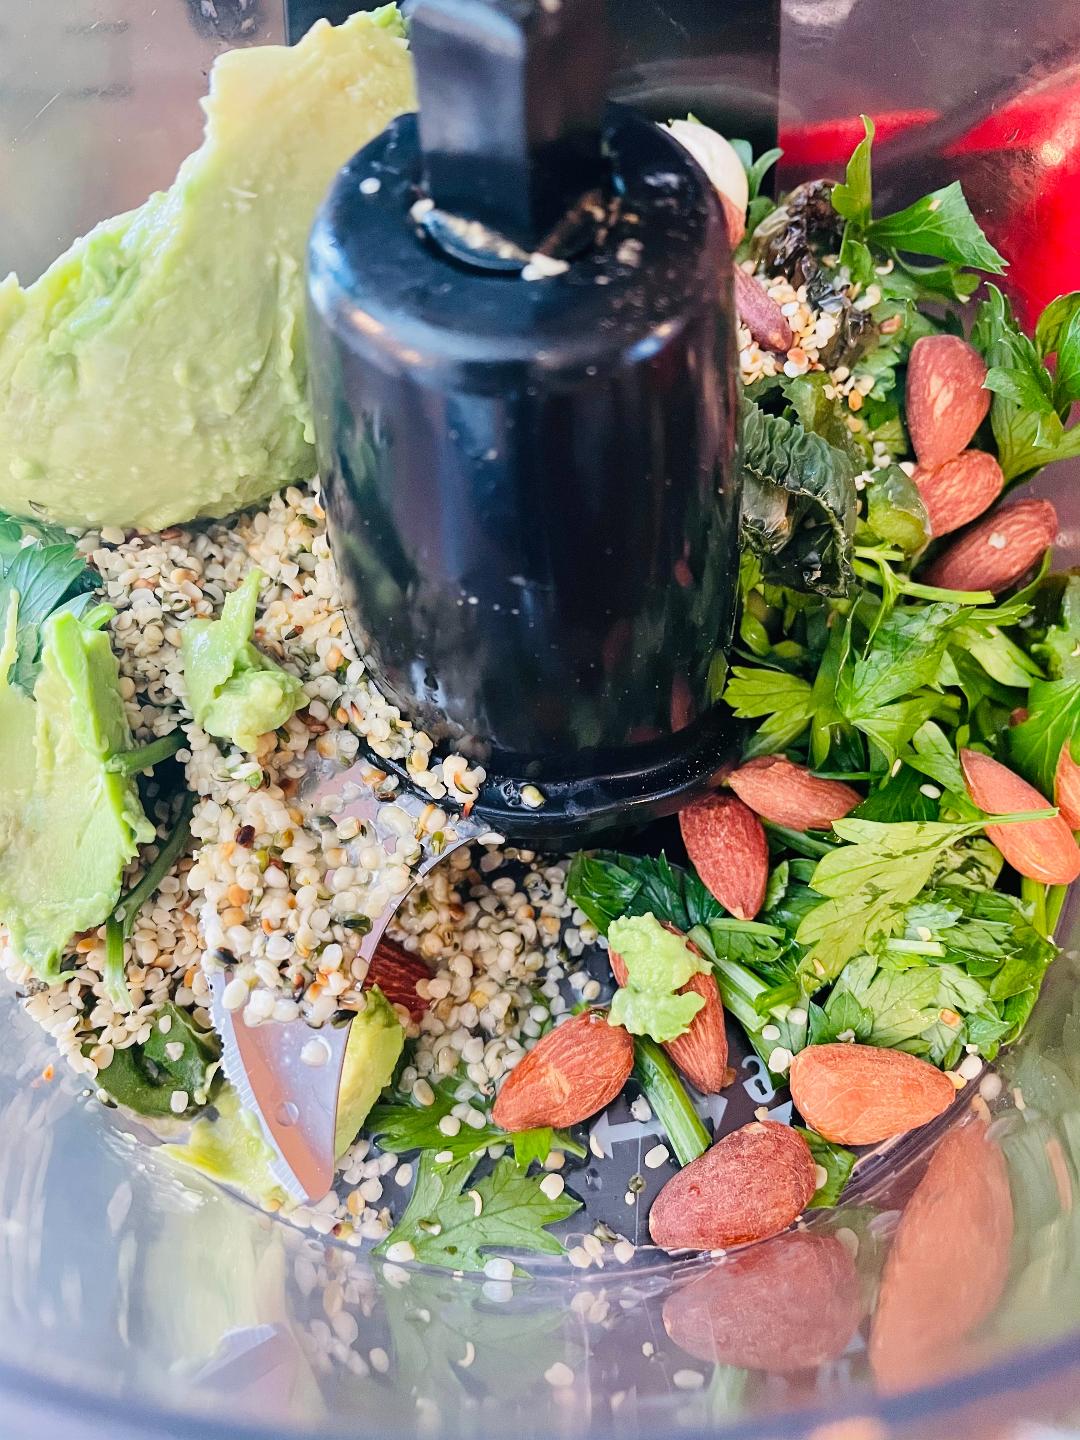 Add the olive oil in a steady stream on low speed until it comes together and makes a chunky texture. 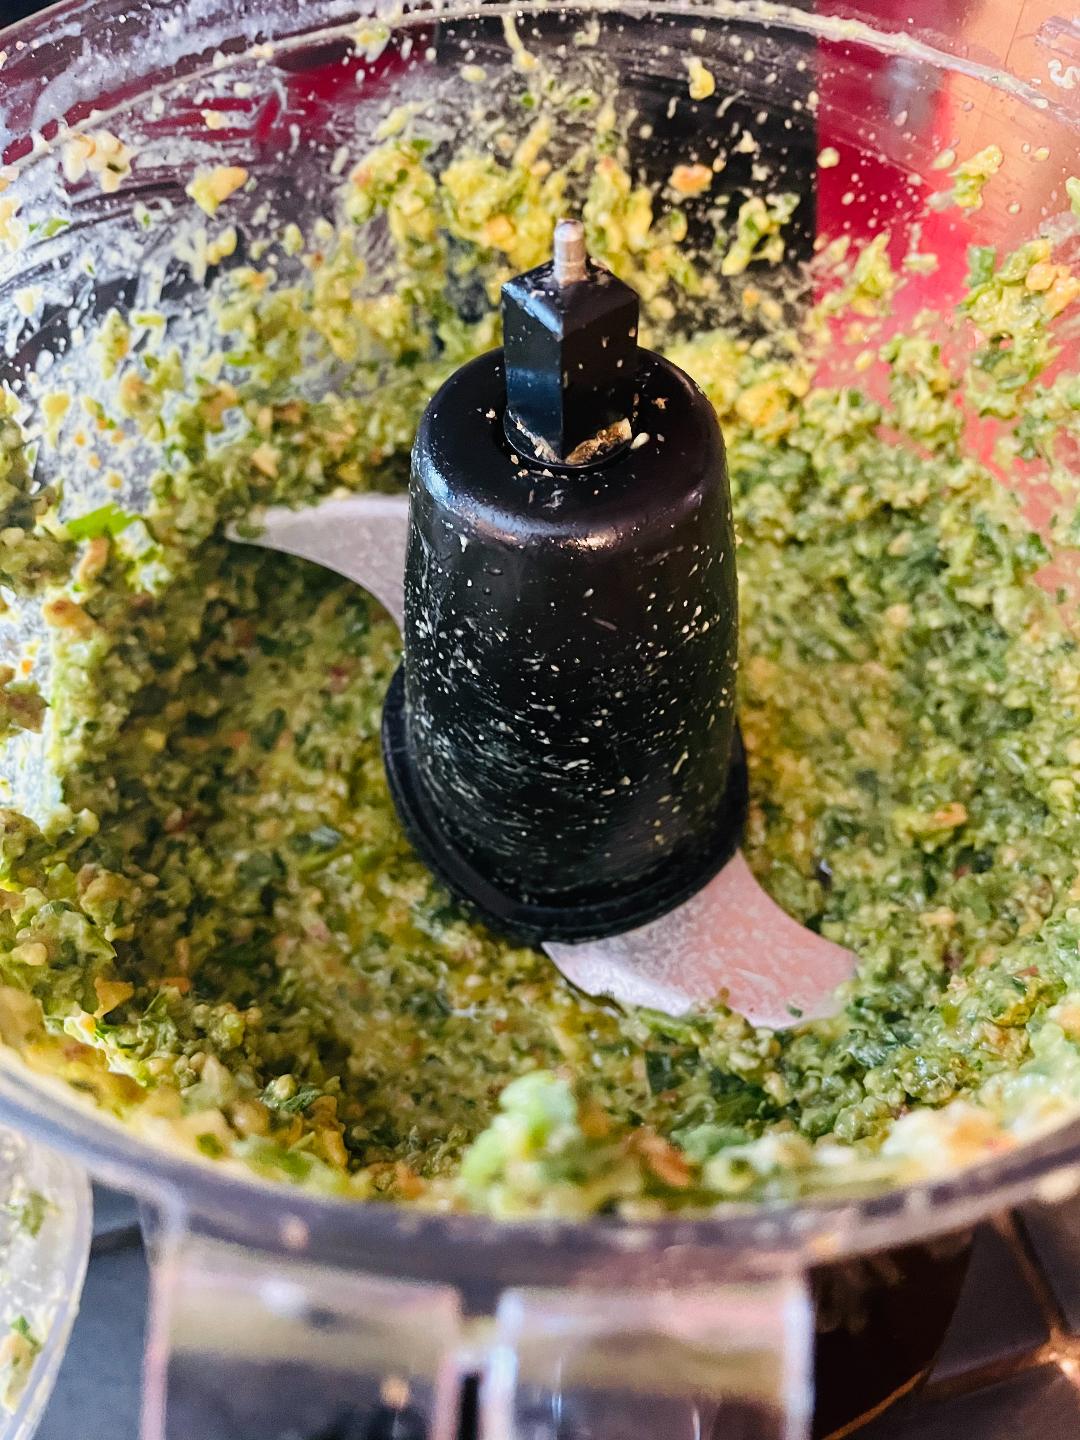 Store in closed jar and place in the fridge for up to 1 week. For longer use, place in a freezer for up to 6 months. 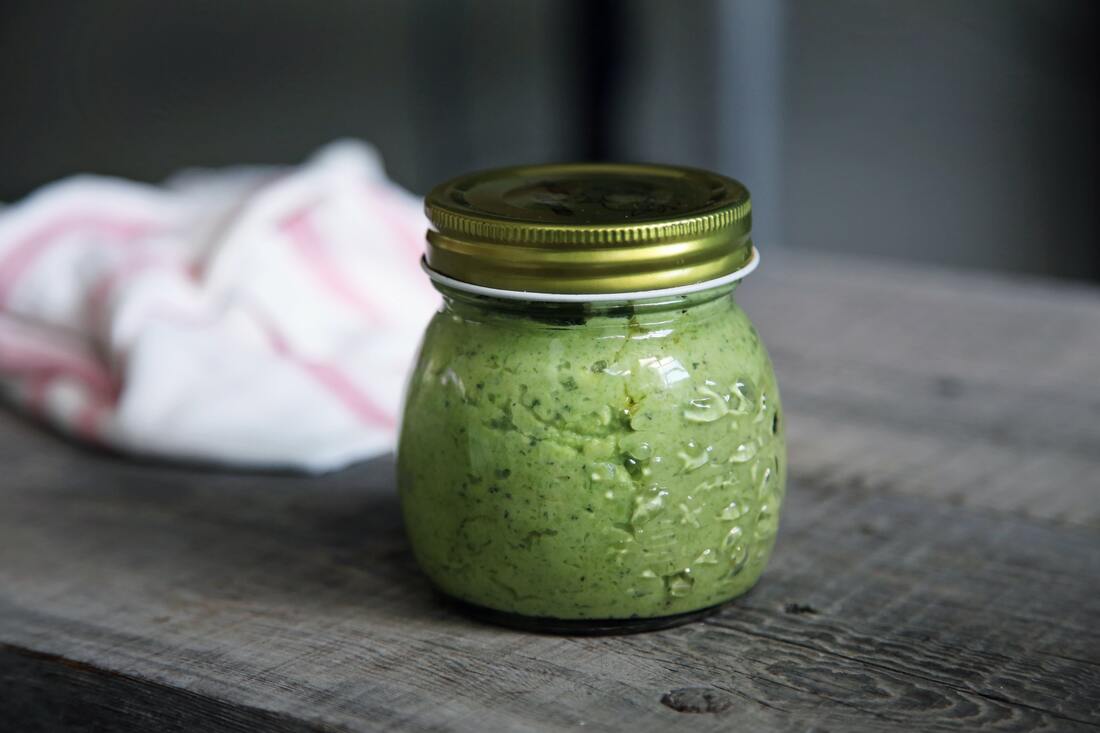  Ingredients:Makes 1 cup
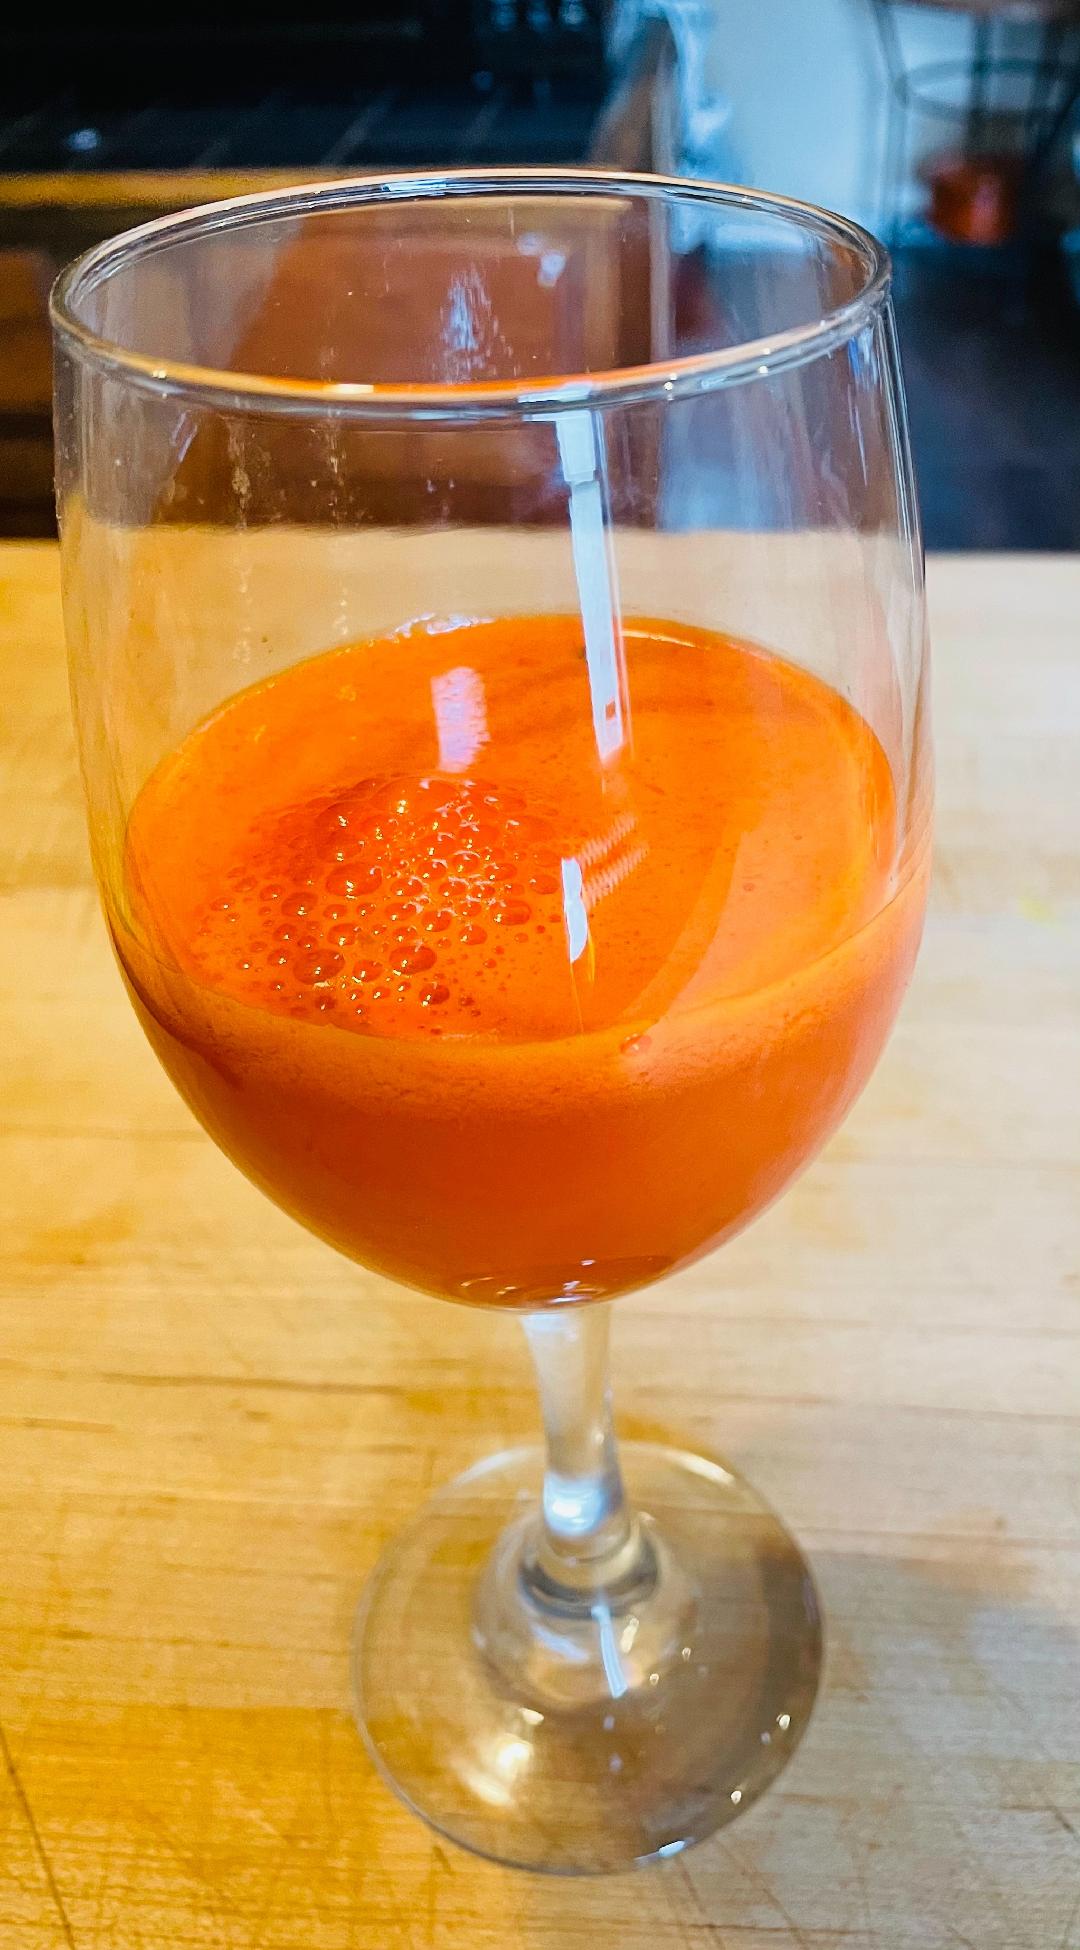
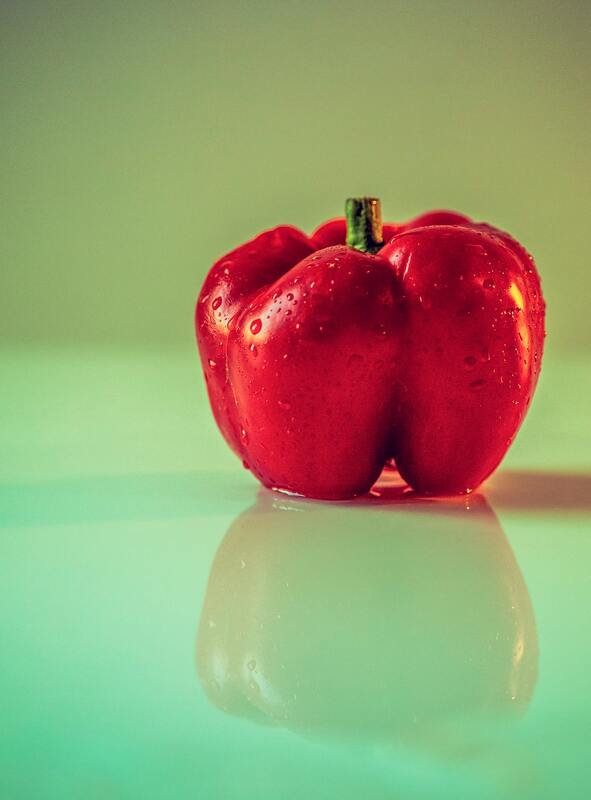
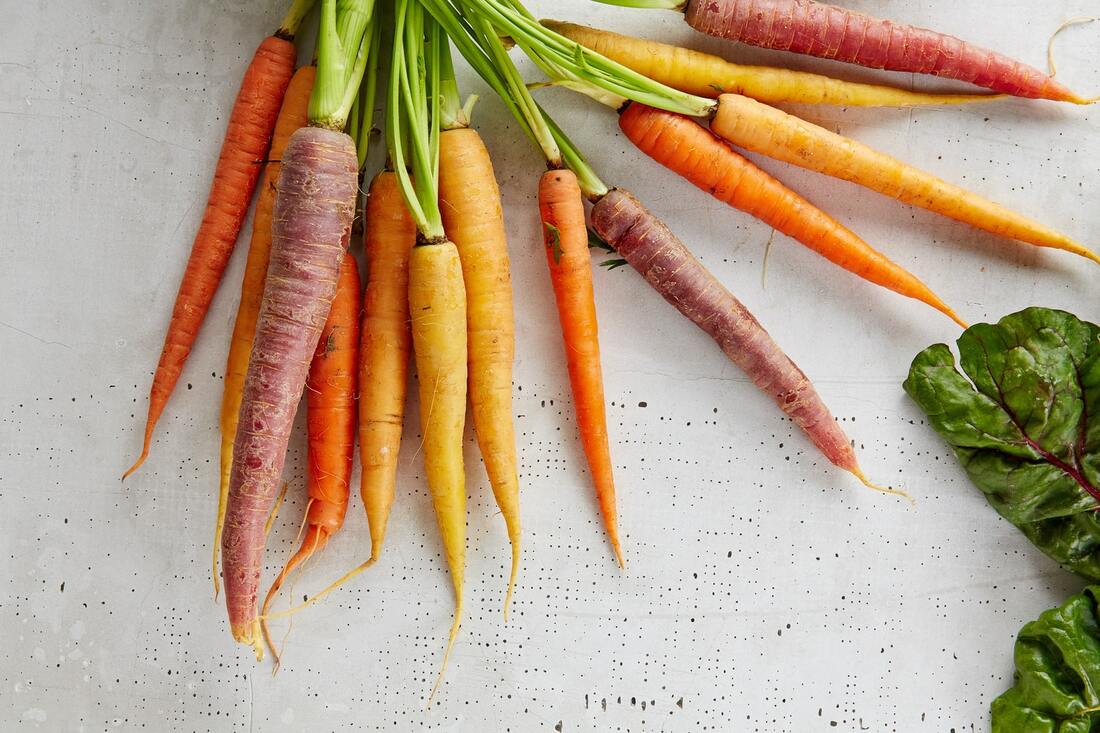
1/4 cup of aquafaba (liquid from canned chickpeas) 2 tablespoons of fresh squeezed lemon juice 1 teaspoon of Dijon mustard 1 teaspoon of kosher salt 1/2 teaspoon of garlic powder 1/4 teaspoon of onion powder 1 cup of extra light tasting olive oil In a blender, add all of the ingredients, except the olive oil. Blend on low speed until the mixture comes together. Continue on low speed and gradually add the olive oil in a steady, slow stream until the mayonnaise comes together gets thick. (This takes roughly 3-4 minutes.) Place into a jar with a lid and place in the fridge. This fresh mayo will last for 2 weeks. Enjoy this simple juice when you need a quick burst of energy!
Ingredients: 1 medium sized red bell pepper, sliced in half tip removed 2 medium sized carrots, chopped in half (if not using organic, peel first before adding to your juicer) Juice of 1/2 small lime, peeled Directions: Place all ingredients into a juicer. Pour into a glass and enjoy! |
Archives
May 2024
Categories
All
|
 RSS Feed